Open Crease Detection, a window will pop up. Do these actions in it:
Select the imported from history model as baseline
Select Left_upper_limb -> Skin_of_left_free_upper_limb , Body_proper -> Skin_of_trunk, Left_lower_limb -> Skin_of_left_free_lower_limb and Right_lower_limb -> Skin_of_right_free_lower_limb entities to be processed
Check both the "Generate boxes..." checkboxe on the bottom of the window, uncheck "See selection boxes"
Press Compute Quality (see Surface crease detection for details). This will perform automatic selection of damaged parts of the skin - you can manually enhance this selection if you feel that the automatic one left out some part that should be considered as damage too.
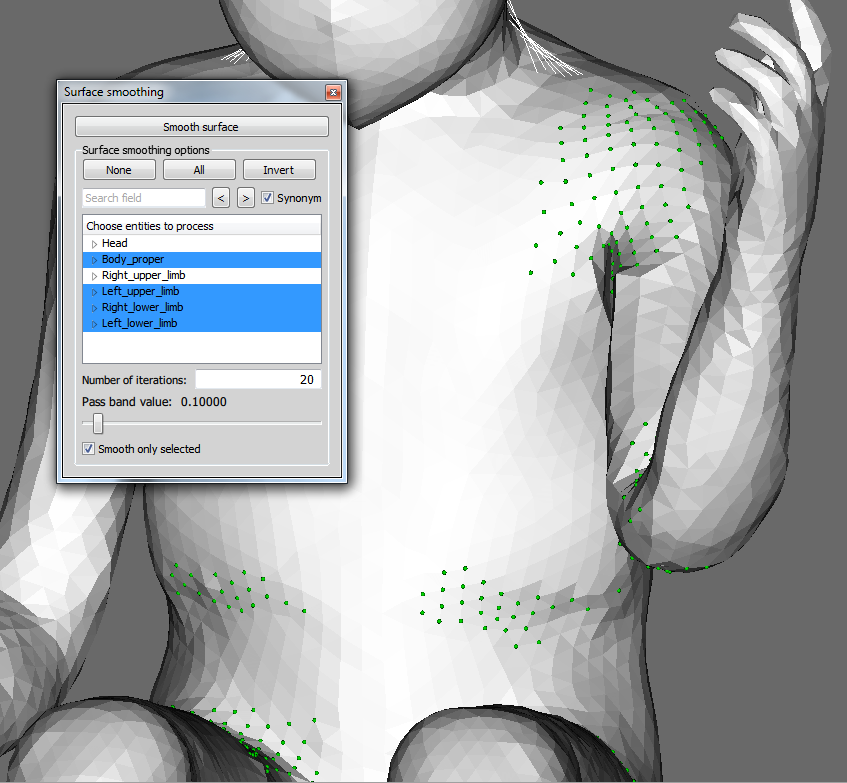
Then open Smooth Surface and in the tool window do:
Select the same entities as in the previous step
Check Smooth only selected (should be checked by default)
Press Smooth Surface (see Smoothing the surface of an entity for details). You should get something similar to the following screenshot:
Smoothed skin of the arm
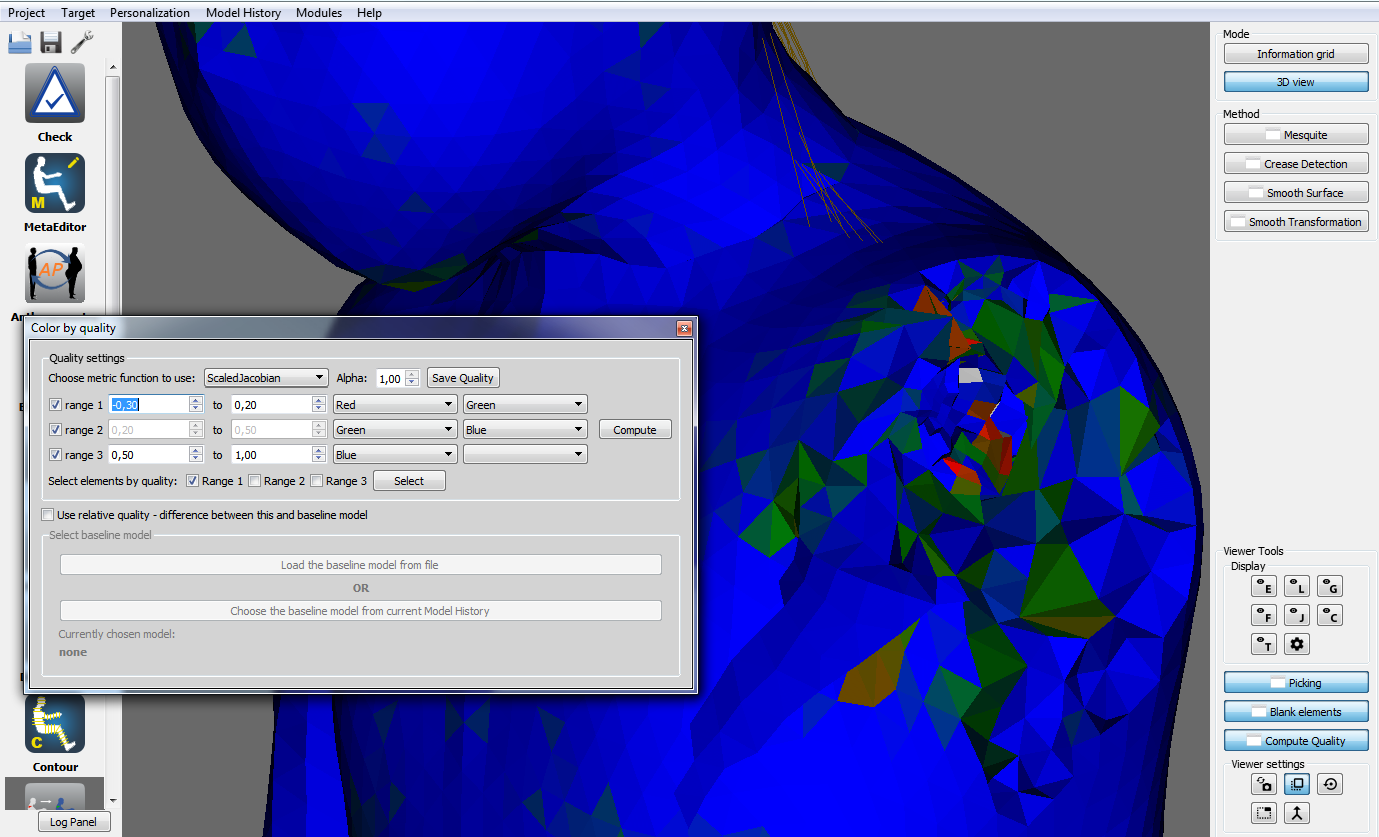
The skin now looks better, but we can use Blanking and VTK toolkit Quality metrics to see that the inside elements are significantly distorted. Note - we no longer need the nodes to be selected, you may deselect them in order to "clean-up" the visualization.
Use element selection by box to select the left arm and half of the shoulder
Blank selected elements using the Blank elements tool
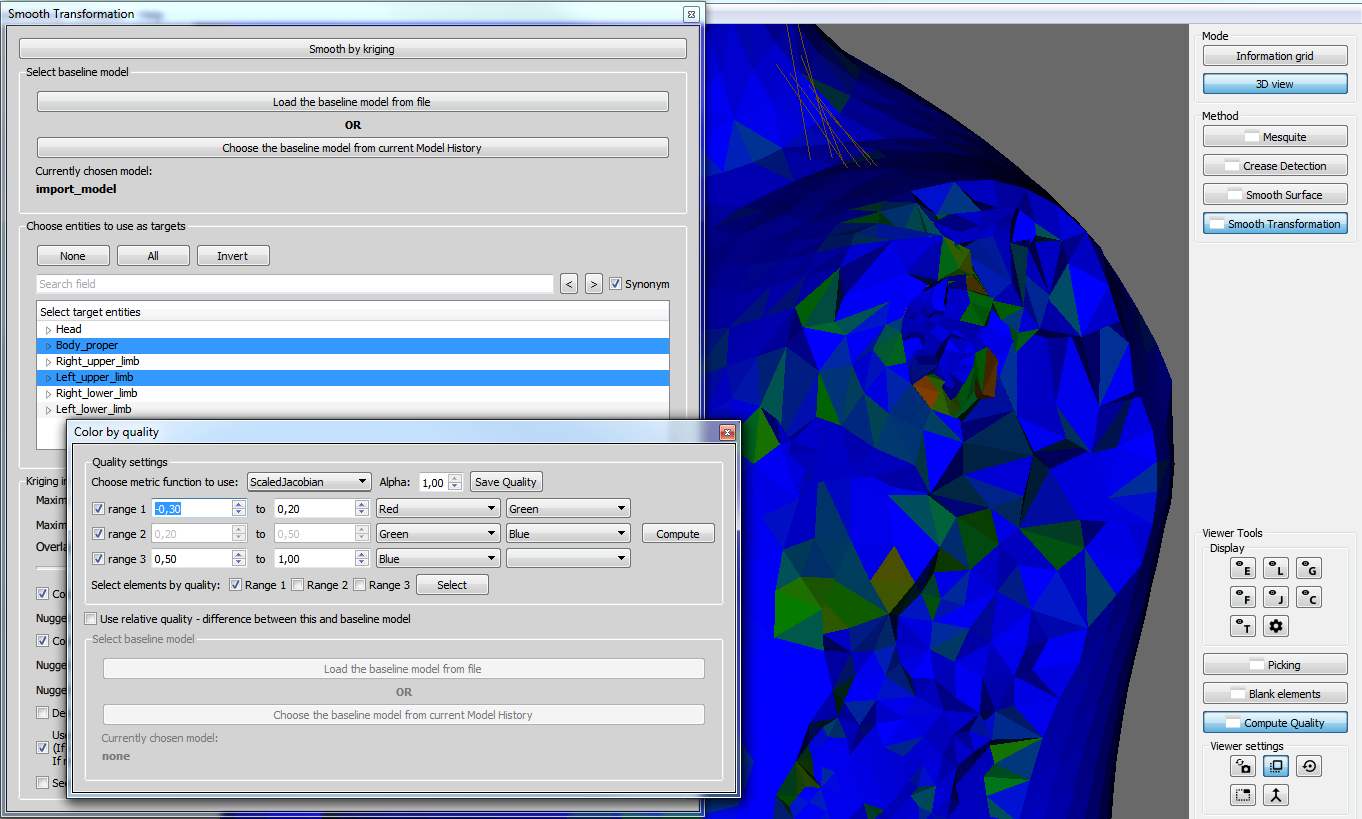
Use the Compute Quality tool too see the element quality - the color scale setting can be seen on the screenshot (white elements are elements out of the scale, in this case with scaled jacobian below -0.3):
Internal element quality of shoulder
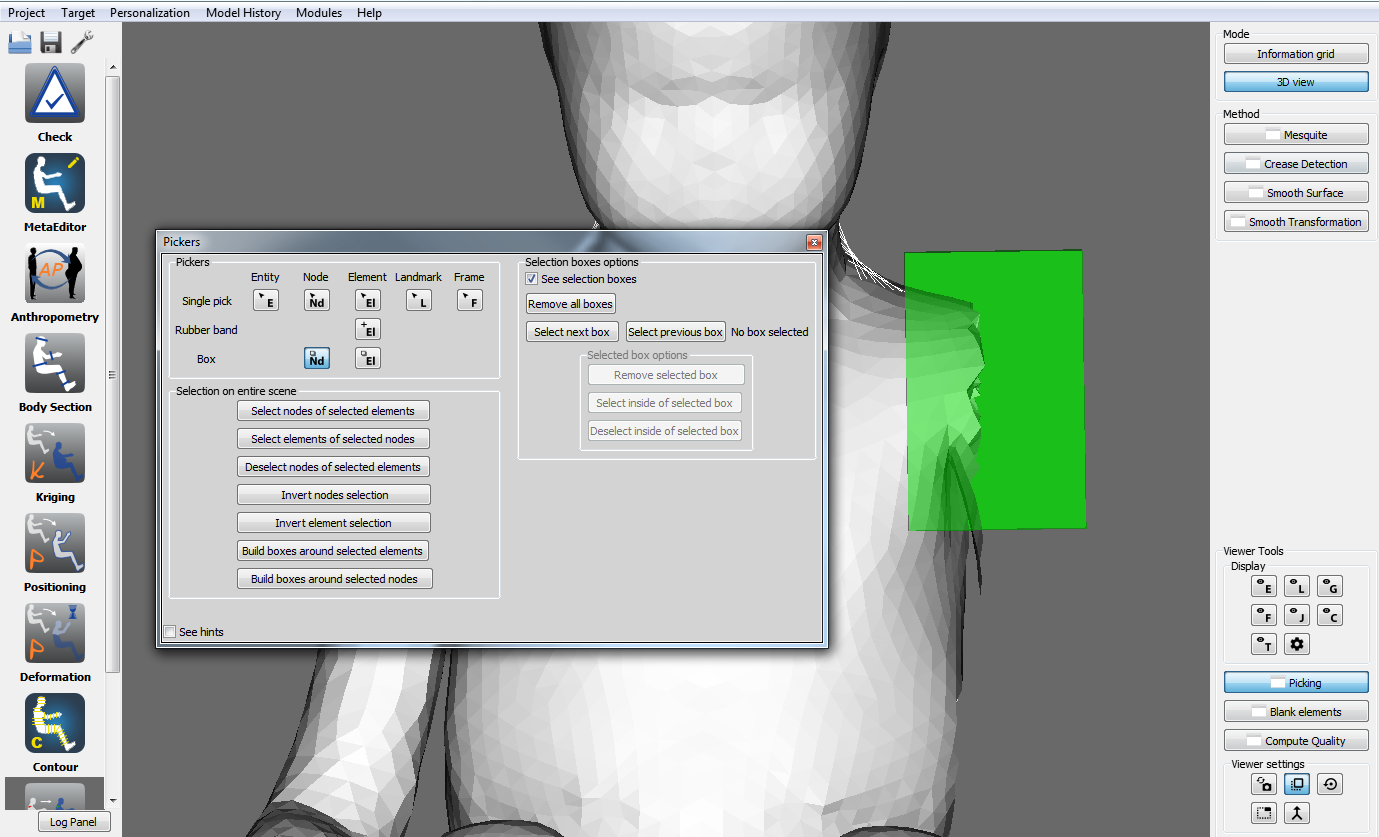
We will smooth the transformation to get a better result:
Use the Picking toolbox to create a box around the shoulder area, similar to the one in the following figure (we used the node box picking and held CTRL so that no points were selected, but anything that will create some box will do the job):
Select the whole Body_proper and Left_upper_limb regions - not only the skin, but whole regions, this way both the bones and the skin will be used as targets.
Press Smooth by kriging, wait for the result
Compute the element quality again using the same color-scale. As you can see in the followin figure, the element quality will increase significantly:
Now you can repeat this step (6d) in a similar way to smooth the hip joints region as well - or do it all at once, the Transformation smoothing will process all boxes that you create. However, don't forget to additionally select entities relevant as targets for the hip smoothing, i.e. both lower limbs
After transformation smoothing
And finally you can export the positionned model back to the FE code format in the Project menu
This work has received funding from the European Union 7th Framework Program (grant agreement n°605544 [PIPER project]) - Documentation under license GNU FDL 1.3 - Generated on Fri Jul 21 2017 13:23:55 for PIPER by
1.8.10
 1.8.10
